|
|
|
Who's Online
There currently are 6043 guests online. |
|
Categories
|
|
Information
|
|
Featured Product
|
|
|
 |
|
|
There are currently no product reviews.
 ;
Owner-manuals.com is the best Possibility to give vantage HIGH CLASS Elektronic COMPONENTS
a new Life.Thanks alot for your perfekt Service.
;
I am proud of you. In the future, I benefited from your services.
;
I found this manual to be complete in every detail. Besides the schematic it has a complete set of alignment instructions which are easy to understand. It also includes a complete parts list as well as an explanation of how the power supply and safety shutdown circuits operate. Even a schematic of the tuner is included.
 ;
The product was good and just what I needed, however I had moderate difficulty with the down load because the sight would not recognize my pass word. I was finally given a direct link to the manual and that worked.
;
Very quick and easy website to use and fast download of manual, quality of manual is excellent and will be pleased to use this service again in the future, thanks so much!
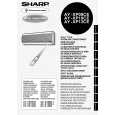
AY-XP08/10/13CE AE-X08/10BE-C AE-X13BE
CN101 and CN102
How to remove the horizontal louver Slightly pull down the hinge area, deflect the louver, and unhook it from the hinge. Remove the shaft from each of the left and right sides.
5. Remove 2 connectors. How to remove the HI VOLTAGE UNIT. 1. Remove the HIGH VOLTAGE UNIT.
6. Pull the board. Drain pan and related (Press and spread the hook, and HI VOLTAGE will be ready for removal.) How to remove the DUST SENSOR, the THERMISTOR and the GAS SENSOR. Remove the DUST SENSOR, the THERMISTOR, and the GAS SENSOR.
DUST SENSOR GAS SENSOR
1. Remove 3 screws fixing motors.
Drain Hose
THERMISTOR
Drain pan Groove
Projection
(Press and spread the hook,and GAS SENSOR will be ready for removal) How to remove the display board unit 2. The display board unit 2 is pushed in the direction of arrow 1 . And it is made to slide in the direction of arrow 2 , and remove.
1 2
To disconned
To reconnect
2. Turn the cap area of the drain hose counterclockwise, and remove it from the drain pan. During installation, turn the drain hose to the state of the �engagement position�. After reinstallation, verify that it is securely fastened.
display board unit2
38
|
|
|
> |
|