|
|
|
Who's Online
There currently are 6043 guests online. |
|
Categories
|
|
Information
|
|
Featured Product
|
|
|
 |
|
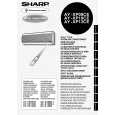
- SPECIFICATIONS
- EXTERNAL DIMENSIONS
- WIRING DIAGRAMS
- ELECTRICAL PARTS
- BLOCK DIAGRAM
- MICROCOMPUTER CONTROL SYSTEM
- FUNCTIONS
- FUNCTION AND OPERATION OF PROTECTIVE PROCEDURES
- BREAKDOWN DIAGNOSIS PROCEDURE
- REFRIGERATION CYCLE
- PERFORMANCE CURVES
- DISASSEMBLING PROCEDURE
- OPTION
- REPLACEMENT PARTS LIST
There are currently no product reviews.
 ;
hat alles sehr gut geklappt. Das Servicemaual ist gut zu verwenden. Die Pläne und Schrift
ist klar und leserlich. Außerdem preiswert. Grüße an alle Hifi-Bastler
;
I got the manual quickly after the payment was transfered (1 day). The manual was exactly what i needed and the updates via e-mail were great. Thanx!
;
I've looked for this manual all over that internet, you guys had it and to a good price. A++++
;
I've looked some time for this manual, you guys had it and to a good price. A++++
 ;
factory technician level - complete with board views :
( removing chassis from cabinet , only thing missing ) ;
on weekends , staff is not available so - be patient .
AY-XP08/10/13CE AE-X08/10BE-C AE-X13BE
CN101 and CN102
How to remove the horizontal louver Slightly pull down the hinge area, deflect the louver, and unhook it from the hinge. Remove the shaft from each of the left and right sides.
5. Remove 2 connectors. How to remove the HI VOLTAGE UNIT. 1. Remove the HIGH VOLTAGE UNIT.
6. Pull the board. Drain pan and related (Press and spread the hook, and HI VOLTAGE will be ready for removal.) How to remove the DUST SENSOR, the THERMISTOR and the GAS SENSOR. Remove the DUST SENSOR, the THERMISTOR, and the GAS SENSOR.
DUST SENSOR GAS SENSOR
1. Remove 3 screws fixing motors.
Drain Hose
THERMISTOR
Drain pan Groove
Projection
(Press and spread the hook,and GAS SENSOR will be ready for removal) How to remove the display board unit 2. The display board unit 2 is pushed in the direction of arrow 1 . And it is made to slide in the direction of arrow 2 , and remove.
1 2
To disconned
To reconnect
2. Turn the cap area of the drain hose counterclockwise, and remove it from the drain pan. During installation, turn the drain hose to the state of the �engagement position�. After reinstallation, verify that it is securely fastened.
display board unit2
38
|
|
|
> |
|