|
|
|
Who's Online
There currently are 5864 guests online. |
|
Categories
|
|
Information
|
|
Featured Product
|
|
|
 |
|
|
There are currently no product reviews.
 ;
a solid deal - quick and without any problems.
I life in europe - with downloads no loosing time
once again
 ;
got exactly what i ordered in a very timely manner. will use again for other manuals
;
I'm happy. Good quality. Very helped me with my work..............................
;
This is the second Manual I have ordered from owner-manuals, I give it five stars because it is exactly what I expected given the age of the equipment. So the contents look a bit aged and the pictures a bit grainy, it fulfills my needs and I am glad I can still get hold of them.
;
thank u so much for this manual that was so cheap that i thought it was a scam but i gambled anyway because it was too good of a deal to pass up and behold,the manual has everything and details of everything even the screws and im still amazed and very happy with my manual .so take my word and jump on it before they realize how cheap they selling thier manuals..thank you so much for taking time to read my thoughts
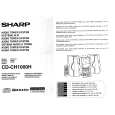
CD-CH1000H/CD-CH1000W
Mark position Be sure to assemble the tray into this position. 191~196 TRAY1~TRAY6
142 LIFT GEAR A 145
Insert it along the guide of the change box. 132 133
,,,, ,,,, ,,,,
146 110 147 130 TRAY No.1~6 135 111 141 143 144 140 Rear surface: Stamped. Note: During insertion, Do not accidentally rearrange tray numbers.
,, ,,
Rear side
Tray installing method: (After adjusting the height of the STB holder) 1. Turn the mode big gear to the mark position to lower the STB holder to the bottom area. 2. From the front side, install the tray. (Securely insert it to the lock position.)
140 TRAY 6 TRAY 5 TRAY 4 TRAY 3 TRAY 2 TRAY 1
130 135
Figure 23
Measure to be taken when a disc cannot be removed due to a mechanism trouble
First, remove the mechanism unit section from the set, and check for the state of the disc. (Remove the top plate R if necessary.) <State of the disc> (1) When the disc is in the normal PLAY (chucking) position -> Try to eject the disc by turning the mode big gear/tray big gear manually. * At this time, be sure to adjust the tray's position (height). (2) When the disc is in the normal STOCK position -> Try to eject the disc by turning the tray big gear manually. * At this time, be sure to adjust the tray's position (height). (3) When the disc is not in the normal position -> The tray or disc is not in the normal position. (The tray or disc may catch somewhere.) Remove the TOP PLATE F/DISC OB lever. Unlock the tray lock lever and pull out the tray which is not caught. Move the caught tray or disc and remove the disc. In case of (1) and (2), the mechanism is normal (defective circuit parts, etc.). However, it may stop somewhere. This is the reason why you should try to turn the tray big gear first. In case of (3), either of the big gears does not turn. � 23 �
|
|
|
> |
|